MFA – Protect Exchange OWA browser-based requests

Currently, we’re all aware that we must secure the user’s accesses more than ever, but if is simpler to achieve this goal for resources managed in the cloud, is also possible to remain a similar approach when we have resources on-premises as well. Nowadays, our users became more productive than ever, and they want to access to their resources faster even from the corporate device, or personal tablet or managed smartphone. Our goal is always promoting this productivity while securing these requests. This is why e-mail became the “opened door” that might be protected, no matter how is accessed.

Azure AD Premium delivers a very useful feature to protect the user’s identities through the implementation of Conditional Access policies. These policies intend to protect the user identity and to control the behavior of a user when it tries to access to a specific (or multiple) app(s) managed inside of Office 365.

But what if we want to protect the accesses from our users to a on-premises application such as OWA? (We found many scenarios where organizations don’t have all user mailboxes hosted in Exchange Online). This post intends to provide a quick guidance over this scenario.

1- Implementation of Azure AD Application Proxy

Azure AD Application Proxy comes into this scenario to deliver the user’s requests from the cloud (e.g.: my apps portal). The implementation is quite simple. From the Azure AD portal, we can download the msi and what we need to perform is just an installation of a dedicated pool of servers (to provide high availability).

In the end of the process, when we access to the Azure AD portal, we must get the server(s) visible and the status must remain “Active”.

2- Application registration process

From the Azure AD portal, we can create the application. For this process is important to get the OWA internal url. The Azure AD App Proxy will provide the “translation” of the url to deliver the requests from the Office 365 service.

To achieve that, from the previous image, select the option “+ Configure an app” and follow the required fields. The external url will be “provisioned” automatically following the internal url options previously set.

In this phase, all we know is that we’ll have a dedicated server (Azure AD App Proxy) that will be responsible to provide the routing of requests to an internal url (OWA internal url) and will delivered to a secured channel over a public url.

3- Activation of User’s SSO

To deliver a better user experience for end users, the SSO from Azure AD Connect can be easily assigned. During the process, a computer object will be created inside of our Domain Controller named AZUREADSSOACC.

To achieve the full AAD SSO experience, a couple of GPO settings must be configured. Those settings might be slightly different depending on the browser, but for this demo, will cover for Edge (chromium-based) scenario.

First, search on the web for the MS Edge ADMX files, include the files inside of the AD management and configure the following settings:

User Configuration > Administrative Templates > Microsoft Edge > HTTP Authentication

  • Specifies a list of servers that Microsoft Edge can delegate user credentials to
  • Configure list of allowed authentication servers

For both settings, the value is the same – the url of SSO – https://autologon.microsoftazuread-sso.com

For more, details, access to the following URL.

4- Create the Conditional Access Policy

Since we already have the application registered, the Conditional Access policy just to need the configured app in the step 2, and the option to require MFA.

5- User experience

Since we’ve all required configurations provided, the user experience of the users will be:

a) the user access to the myapps portal to access to the published OWA (available URL can be deactivated) without requiring AAD logon (through the implementation of the SSO experience only for managed devices). We can add the myapps app to require MFA as well.

b) the user clicks on the available app (OWA). The Conditional Access policy takes the control and require the end user to answer against an MFA request.

c) the internal url is redirected using Azure AD App Proxy and the user can access to his mailbox securely using Azure MFA.

d) OWA page

Note: All configuration tasks are being stored inside of the Azure AD App Proxy Event Viewer and can be accessed for troubleshooting purposes from the following path: Event Viewer > Applications and Services Logs > Microsoft > AadApplicationProxy > Connector > Admin

/ Fábio

Microsoft Sentinel – Build an Analytic Rule to trace Azure Activity

Since I receive this request very often during several conversations with customers and peers, i though in dedicate a specific post to cover this scenario. The question is: “Basically, what do we need to do to get alerts when someone (user or application) do some specific activity inside on Azure?”

The answer can be achieved using Microsoft Sentinel (MDfC can be an option as well).

Microsoft Sentinel, a cloud-SIEM (and SOAR!) native solution, is fully designed to collect information from many sources (On-Premises, Multi-Cloud, Azure), allowing us to design our custom triggers through a feature inside of Sentinel known as Analytics Rules. In this use case, we need to provide a few configurations before we implement the trigger (i mean, the Analytic rule!) that, when matched, will create the alerts.

1- Requirements

Requirements validation is always the first step that we must address. In this case, we need to start collecting our Azure Activity data (which is currently FREE by the way – as long as you don’t extend the 90 days retention inside of Log Analytics – more info regarding free data connectors AKA data sources here).

2- Enable Azure Activity data connector

The activation model of the data connectors depends on the technology. In this scenario, Azure Activity data source relies on a predefined Azure Policy that easily stream all Azure Activity events to be stored in our Sentinel Log Analytics workspace. If you access to the Azure Activity data connector, you’ll get all required information that you need to activate the Azure Policy – in a remediation assignment. In the policy, just need to select the Sentinel dedicated workspace and select apply. Please expect some delay before you got the green flag in the Azure Activity data connector.

3- Configure the Analytic Rule

As we saw earlier, Analytic rules act as triggers, and hopefully they’re based on KQL queries, which make our lives easier when we need to validate our collected events inside of Log Analytics workspace. We’ve many available analytic rules (in the rules templates pane) that we can easily activate, and as long as we activate data connectors, that are many additional analytic rules that can be activated as well.

In this example, I want to be notified (through a Sentinel Incident) whenever my storage accounts keys are listed. To achieved it, I’ve start seeking for a query to acknowledge that purpose:

AzureActivity
| where OperationNameValue == "MICROSOFT.STORAGE/STORAGEACCOUNTS/LISTKEYS/ACTION"
| sort by TimeGenerated desc

So now, i’ve all the required information that i need to create the analytic rule. Accessing to the Analytics rule wizard (inside of Sentinel portal), and fulfilling the required options in the general tab is the first step. The second one is regarding the rule logic, and in this one, we need to insert our query (validate the output in the first place on the right side bar option “Test with current data”). The entity mapping is where we can configure the match between our generated output from the query and well-known Sentinel entities. In this one, I’ve assigned the Caller to Name attribute (Account entity), CallerIpAddress to Address (IP entity) and _ResourceID to the attribute ResourceID for Azure Resource entity. The next following options are designed if we need accomplish additional scenarios such as automated response or alerts grouping (and we won’t cover it in this post).

4- Get the alert

Since we’ve got all configured, if some resource list any storage account keys, Microsoft Sentinel workspace will collect this data inside of “AzureActivity” table. The analytic rule will be trigger in a predefined period of time to trigger the alert inside of Incidents pane. Then, mapped entities help us to rapidly understand who provided the access (Caller), from which external IP address (CallerIPAddress), as well as the ResourceID – in this case, which storage account have been accessed.

Happy deployments!

/ Fábio
Microsoft Sentinel – Jupyter Notebooks with MSTICPy (python package)

Hi there!

Such a long time since my last blog post, and so many changes happened in my career. Since the beginning of the blog (started in 2014), so many evolutions happened in the IT world and nowadays cloud definitely is a first choice when we think about a deployment of a new service, feature or even for an infrastructure piece. This fact, drove us to a new reality where we’ve all or a majority of the workloads running through a public internet service – hosted in a public cloud – and since workers are became more “remote”, organizations, need more than ever, to protect the accesses (authentications/authorizations) through a new model and to identify any potential user compromising or data exfiltration or even device accesses as well.

Due this fact, security became such a priority for many organizations that nowadays are facing challenges in order to keep their users productive as well as secure without compromising both user experience and performance.

Microsoft Sentinel became a first cloud-native SIEM in the market and Microsoft are constantly introducing new more features very often. The product integrates in many 3rd party vendors – through the Connectors activation approach – and through the data collection host in Log Analytics workspaces.

This post intends to describe with a little technical detail a feature that can accelerate security events awareness or alerts investigation as well as provide customized information – Jupyter Notebooks with MISTICPy in Microsoft Sentinel.

The Jupyter experience is provide inside of Azure portal – accessed by a mechanism named Azure Machine Learning Studio – and supported by compute resources (Notebooks relies on Compute resource to be executed and to deliver data) that can be executed by .ipynb files format.

Python syntax knowledge is not a primary requisite (of course it’s important but not so relevant), since Python is fed by many packages libraries and Microsoft Sentinel uses a specific one: MISTICPy that leverages the capacity of Security Analysts to accelerate their hunting investigation processes.

How it works?

Microsoft Sentinel hosts collected events from activated connectors in a Log Analytics Workspace. The data collection process is important, but why do we need to store data if we aren’t working correctly with it?

Notebooks is a feature that can help organization to access and to transform Raw data into information to trace applications, users and devices – Notebooks are to help organizations to provide hunting and analytics as well.

Requirements?

  • Azure Machine learning workspace (an Azure ML workspace should be created in the first place)
  • Compute resource to execute the Notebooks (must be assigned due the ML workspace creation)
  • Hosted data in Microsoft Sentinel

How to implement it?

In Microsoft Sentinel portal, 20+ templates are available. From the available Notebooks templates, the “A Getting Started Guide for Microsoft Sentinel ML Notebooks” would definitely work as a first notebook. It contains many steps to help to get knowledge and to understand both queries and results.

Few examples that can be leverage with Jupyter Notebooks with MSTICPy:

1- Query data about Alerts that were triggered. The Notebooks supports the KQL queries which made our lives easier when we want to dig in the search for data in our Log Analytics Workspaces. The output can be presented in a kernel format (“text”).

Through MSTICPy, that are many queries that are available (in this example, the SecurityAlerts), and can be complemented by additional parameters (e.g. summarize, project)

2- Through additional libraries (e.g.: pandas) is possible to integrate dashboards in Notebooks. In this example, is possible check which Alert Severity categories are being triggered in our environment.

3- Capacity to interact with the reporting and through “mouse over” to see additional data that is dynamically presented.

4- Capacity to integrate with external tools to validate rapidly entities without changing the environment (for example, validate a specific IP Address with Virus Total)

More information is available on the following url.

Happy deployments!

/ Fábio
#MEM – Keep managed iOS/iPad devices updated (MDM)

So, after a huge delay, a very nice tip that i think is relevant and can be useful for MEM projects.

Well, first of all, and since Microsoft Intune has changed to its own dedicated portal (a couple of years ago i think), Microsoft has made an extra effort to give this portal new features and new capabilities in a regular basis. While we keep trying to be focus on the main policies and tasks, there are some extra features that stay “hidden” for many of us, but can improve an extra security layer for end user’s devices and to act as a really device management service.

Recently, i was asked if MEM can accelerate the deliver of the new releases to end users devices. Well, it can for Windows 10 (like everybody knows due the Windows Update for Business capabilities included in it). But, for iOS and for iPadOS it helps too.

The feature – called “Update policies for iOS/iPadOS” founded in the “devices” pane – is available since a long time ago (in IT, a couple months become quickly very outdated), but it has now the possibility to check specific available versions (as you can see in the image below). So, once we’ve all iOS managed through MDM approach, we can go on to select a specific iOS/iPadOS version and deploy it. Can be very useful to support specific Line-of-business applications that are only supported for a specific group of OS versions.

/ Fábio

Back to blog – After a (huge) delay

First of all, my apologies. It was a big journey since I published my last post (more than a year). However, since then, I’ve continued to delivering technical projects, wrote notes and continued attending several technical conferences, webcasts and kept reading a lot of blog posts from a couple of IT Gurus.

As we know, since more or less 2015 (probably began sooner, but was realized later), globally speaking, several (IT Delivery services) efforts were made to redirect all offer to move data and services from the datacenter (On-Premises) to the Cloud, and according to that, Microsoft kept constantly delivering so much features, products, programs, services and after that, they’re redesigned the offer, redesigned the strategy… and it becomes so much challenging to be updated across all Microsoft Cloud services.

From my side, my background is totally focused to the end user workplace management, and as everyone agree, the entire management changed from the devices connected to the “On-Premises” domain services to the Cloud directory assignment, introduced by cloud management terms and approaches.

Hopefully, SCCM now integrates (really fine) with Microsoft Intune (and will integrate with additional features of Windows 10) and together, this new offer model supports a full stack of the devices introduced in the current market, like tablets, smartphones to the existent ones like Laptops and desktops. The single-pane of glass, performs a global vision and a powerful management . In addition, the new redesigned Azure portal, support in some specific definitions in order to leverage additional (cool) features for Windows 10 and other additional OS (like iOS and Android).

The Microsoft Intune was included in a suite of products called Enterprise Mobility + Security (which came in two flavors: E3 and E5) and is offered to include Azure AD Premium (Plan 1 and Premium P2), Azure Information Protection (Plan 1 and Premium P2) – which include now the “old” RMS, Multi-factor authentication and Microsoft Cloud App Security. In the other hand, now Windows 10 came in a different offer and includes Windows Enterprise, EM+S and Office 365 called Secure Productive Enterprise (SPE) and is available in two flavors – E3 and E5.

Well, basically our boundaries are focused in wide range of products and services that must be addressed and leverage to our customers in order to deliver additional cool features to improve their productivity outside the office, while keeping the security standards.

From now on, I expect to continue write and post technical tips and tricks but not only focused in SCCM and MDT, but in this new wide range of products and services that are the new workplace vision focused in a new digital transformation offered to support remote work and corporate services available all the time.

See you soon.

/ Fabio
ConfigMgr and MDT OSD | Diving into BitLocker steps

Did you asked yourself about both Bitlocker encryption steps provided by ConfigMgr and MDT task sequences? Well, I did. So, when a customer asked me to include BitLocker encryption I made a few research about this theme to understand each of one differences between them. Below, I try to share a few knowledge about it.

ConfigMgr and MDT integrated scenario:

Let’s consider the scenario on having ConfigMgr integrated with MDT as a starting point, since this is the most used scenario in our customers (at least I hope).
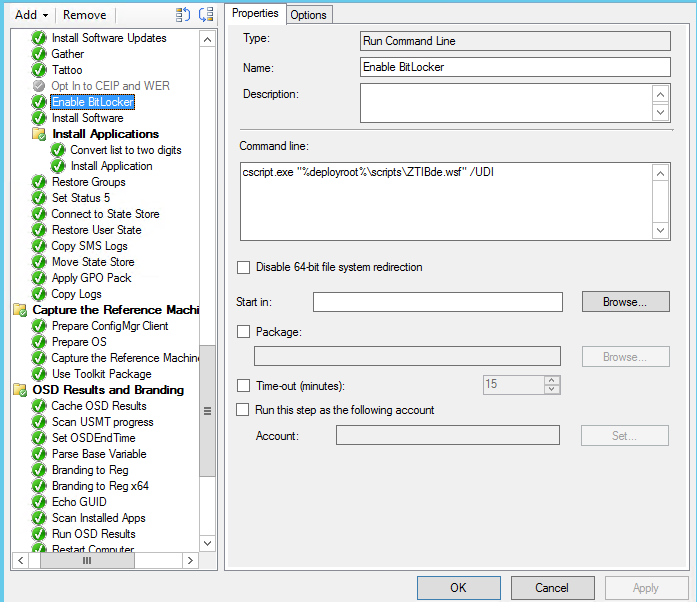
For those who use OSD in that way, this is what you’ll find when you create an MDT Task Sequence in your ConfigMgr console:

027-001

The presented “Enable BitLocker” step is nothing more than an execution of a ZTIBde.wsf script file (executed from the MDT Scripts Package).

The script basically provide a full set of steps (like OS versions, Physical disks, etc.) to validate if the target computer is available for Bitlocker encryption. After performing all validations process, task sequence will start the encryption task using the Windows native tool named “manage-bde.exe” located in the %system32% folder.

027-012

As a last step, the script will place a text file with the Recovery password info into C:\ drive.

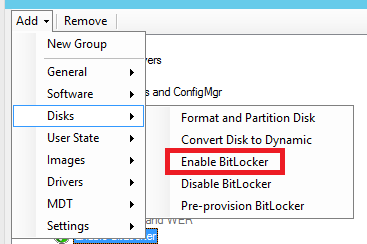
Otherwise, if you want to use the native ConfigMgr BitLocker step from Task Sequence, you can add it on the Disks option into the “Add” pane on top of the page.

027-002

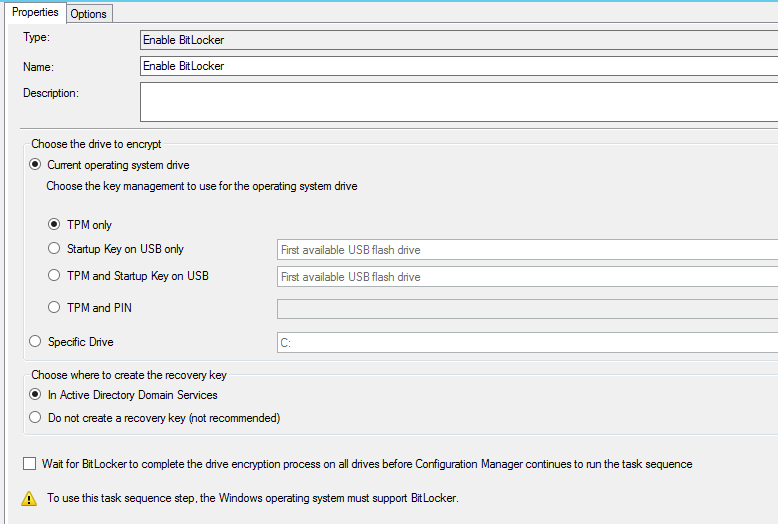
Task Sequence will present the following properties pane as a simple wizard and very similar to the BitLocker page on UDI Wizard.
027-003

What will be performed here?

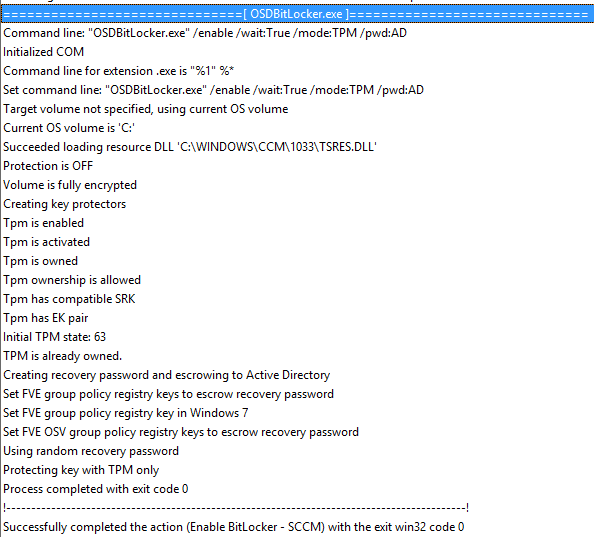
Not so visible like MDT does, but task sequence will run a tool named “OSDBitLocker.exe”. The tool is located into the ConfigMgr installation folder and is copied as a package during OSD process and will do the following steps:

  • TPM Validation;
  • Create the protectors (Recovery Password);
  • OS disk encryption;
  • Set the recovery password to AD (if configured).

027-004

Diving into smsts.log
027-007

MDT Lite Touch:

As you probably know, this is my favorite deployment type. Not only because this is the faster way to deploy customized Operating system images, but is the cleanest and easiest way (with no dependencies) to deploy Windows.
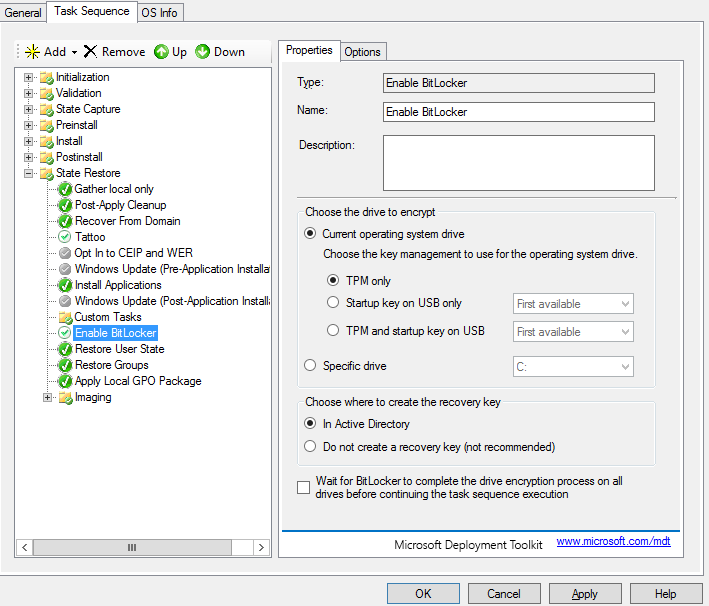
So, when we create a task sequence, this is what we’ll see:
027-010
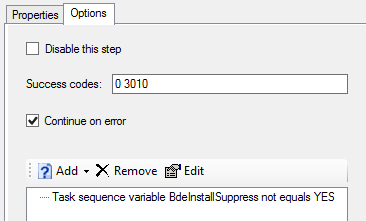
And for options pane, MDT provides us:
027-011
Not difficult to understand, because this is shown in a “Wizard” mode and the variable “BdeInstallSuppress” shouldn’t be YES (via CS.ini or TaskSequence variable).

Additional tip 1:

Since “manage-bde.exe” is a native Windows tool you just can test it in an isolated Laptop/workstation to test it (not with VMs. Check additional tips to understand it better).

In the other hand, if you want to test the OSDBitLocker tool in a completely offline and outside of deployment process, avoiding the wasted deployment duration, just copy the required files and put them in an external USB (for example).

Execute the following command:
027-006
And wait for the BitLocker encryption to be done.


Additional tip 2:

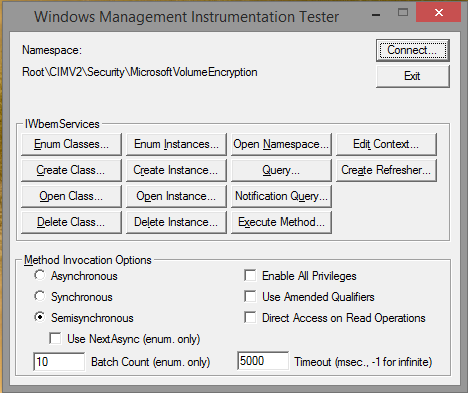
Are you thinking of using this on a VM? You don’t need even to try it. The script will check the physical volumes through WMI and the process is fully explained below.
Namespace: Root\CIMV2\Security\MicrosoftVolumeEncryption
027-008
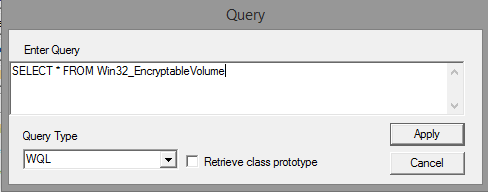
Query: SELECT * FROM Win32_EncryptableVolume
027-009
We you select the “Apply” option, it will be shown every encryptable drives in the current machine.
Try it in a virtual machine to see the reason why it fails every time on them. 🙂

Happy deployments!
/ Fabio

ConfigMgr integrated with MS Intune – Missing some Intune Extension?

I assume that all of us had the same experience at least once: came to a Microsoft Intune (or EMS) project, and have to create all of the office mobile apps for Android and iOS manually on the SCCM console by our own. But this work was a really mess. Because, the research for the official links became the first pain, and then we need to provide the icons adjustment (using MS Paint?!) and then to include some description, and so on…

Well, the good news are here: these days are completely done!

For Config Mgr 2012 R2 SP1 (or SP2 if you want to call it) with CU2 (and for 1511 also), Microsoft developed and deploy a new Intune extension that create all of the Mobile Office Applications for Android and iOS. I mean, for other words, with a couple of clicks, we can replace a good amount of wasted time.

Curious? Give a deep dive on the following link:

Well, backing to the SCCM (integrated of course!)

I have to admit that this issue consumed a couple of hours, and due that fact I felt that I to share my experience on it. And to be honest, I spent a lot of time around the console, because accessing to the SQL database was never the thought that I’d in mind.

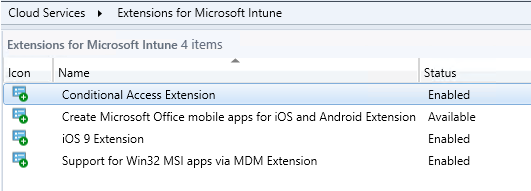
Recently, my daily routine on the SCCM was: “I’ve only three extensions for Microsoft Intune. Am I missing something?”. In fact I was…

The troubleshooting mindset was always around “My SCCM doesn’t get any extension of Office Mobile Apps”. And, once we’re are talking about “cloud services”, we heard so many times everyone telling us to wait for our SCCM to synchronize through Microsoft Intune connector to get the extensions. And that’s what I did.. and I stuck waiting… but nothing happened.

Just in case, if you ever experience a similar behavior on your customers, keep in mind that this solution is completely out of support and if you can, you should try to figure out in a “better” way because my suggestion is fully around SQL. And I am part of those SCCM guys that never ever touched on SCCM database. An yes, in the end I’d to admit: in my case, my SQL database just had an incorrect value on that.

Note: Again, this is not a supported solution! Don’t even try this on a production environment. Try this on your lab please and take your conclusions!

Sharing my “hands-on-lab” experience

First of all, I run a sql query to get some information about all of my extensions:

select L.Name, F.FeatureID, F.StateID,S.FeatureStateName,F.Flag, F.Error from MDMCFDFeature F join CFDLocalizedMetaData L on F.FeatureID=L.FeatureID join CFDFeatureState S on F.StateID=S.FeatureStateID where L.LocaleID=1033

This query returns all of the description names plus the reference ID.

When I saw the results for the first time, I just realized that my Config Mgr really had the extension! But I can’t saw in my console! Confused? This must have an explanation!

026-002

So, it’s time to get more information about the specific Extension running the following query:

Select * from CFDMetadata where FeatureID =
‘692B5EF7-0D8B-42B8-823F-0A890F65A80D’

026-003

And I found a lot of “NULL” values. So, I’ve tried the update for the specified attribute (by my own of course, and on a lab environment as always):

Be Careful if you really want to do this!

update CFDMetadata
set
MinCMVersion = ‘5.00.8239.1000’,
MaxCMVersion = ‘5.00.8239.9999’,
MoreInfoLink = ‘http://go.microsoft.com/fwlink/?LinkId=624495‘,
ReleasedDate = ‘2015-02-10 09:09:00.000’
where FeatureID =
‘692B5EF7-0D8B-42B8-823F-0A890F65A80D’ and FeatureVersion = 82391303

026-004

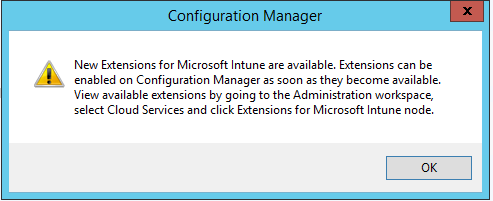
When I restart my console, the Extension pop-up warned me about some extension that I’d available to apply.

026-005

And the extension became available.

026-006

After a couple of minutes…became enabled!

026-007

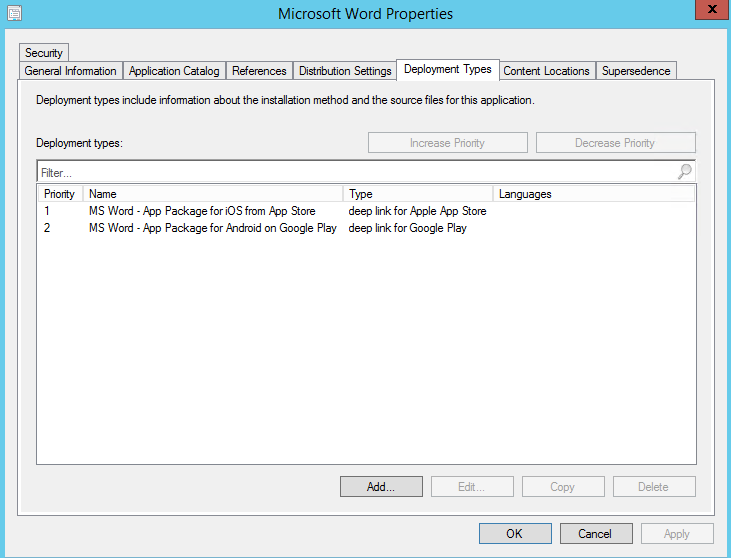
The process will create the office apps automatically.

026-008

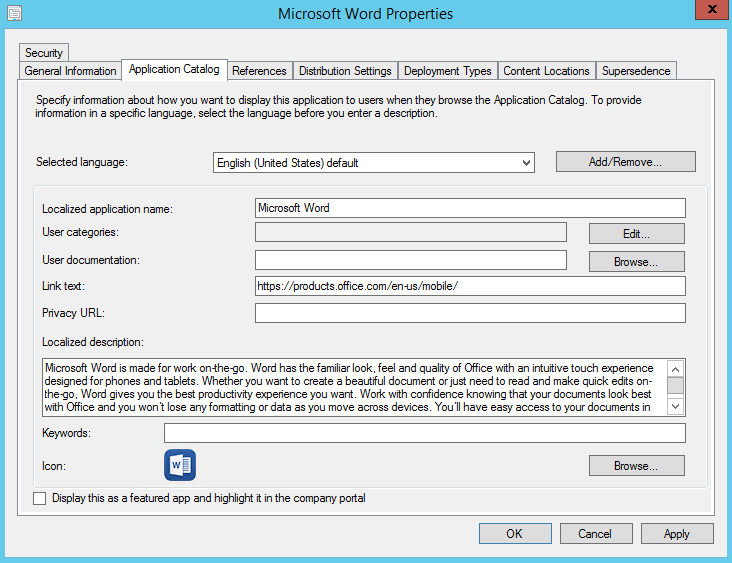
And the “Application Catalog” pane will be full filled also.

026-009

You just have to create your deployments (or advertisements if you want to call it) for your Office Mobile applications/deployment types to your customized users collection. And that’s it!

Enjoy Intune extensions! Enjoy SCCM integrated with Intune!

/ Fabio

Upgrading MDT 2013 Update 2 – In-Place

Probably this post is the less useful than I ever wrote, but once Microsoft recently released a new version of Microsoft Deployment Toolkit (MDT) named 2013 Update 2, I just realized that I should try for the first time an upgrade in-place of MDT.

Well, few of us talk about upgrade in-place of MDT infrastructure once the Deployment share (DS) are very modular and simple components and due this fact, they can be copied and pasted in a autonomously way. So, is very simple to just create a new Virtual Machine, install the new version of MDT and point to the deployment share folders. Quite simple and just works.

Despite of that, for the first time, I tried to make an upgrade in-place from MDT Update 1 to Update 2 for 2013 version. The result is paste below and at least can be used on your lab’s.

On “Program and Features”, you can check the actual version of the MDT version. In my case, previously I had 2013 Update 1: 6.3.8290.1000.

025-001

Well, I just got the new msi file from Microsoft website and executed with no fear. 🙂

025-005

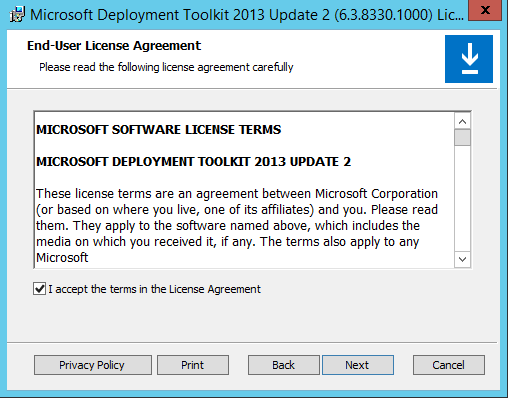
Just accepted the EULA.

025-003

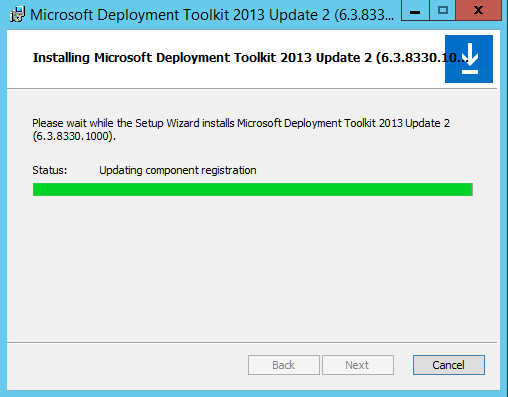
The wizard detects that the current machine has a previous version installed and run an “Update” for all components in a very transparent process.

025-004

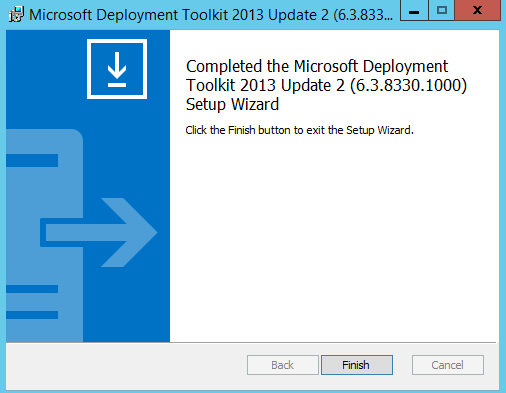
After a few seconds (around 20 or 30), the wizard give us an available “Finish” button.

025-005

When, I accessed to my new Workbench, I got the following message, warns me that all my deployment shares require an upgrade. Just right-click on each one an press the “Upgrade Deployment Share” option. Nothing simpler.

025-006

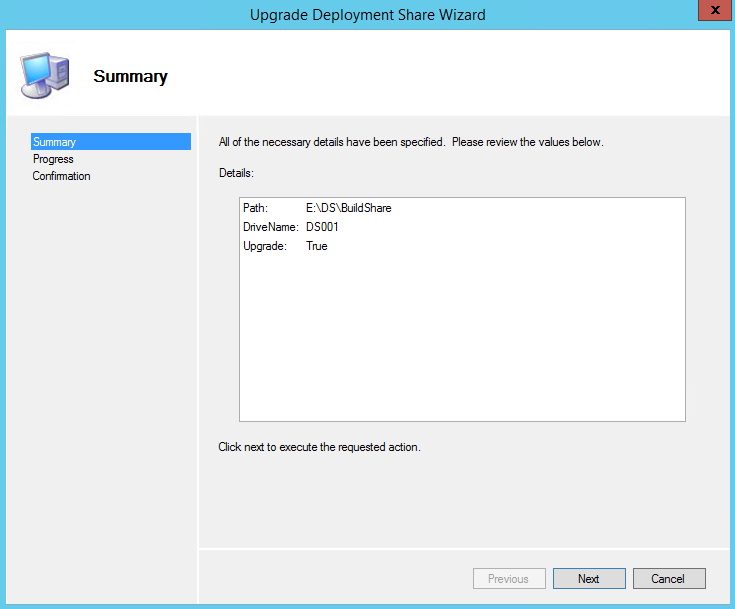
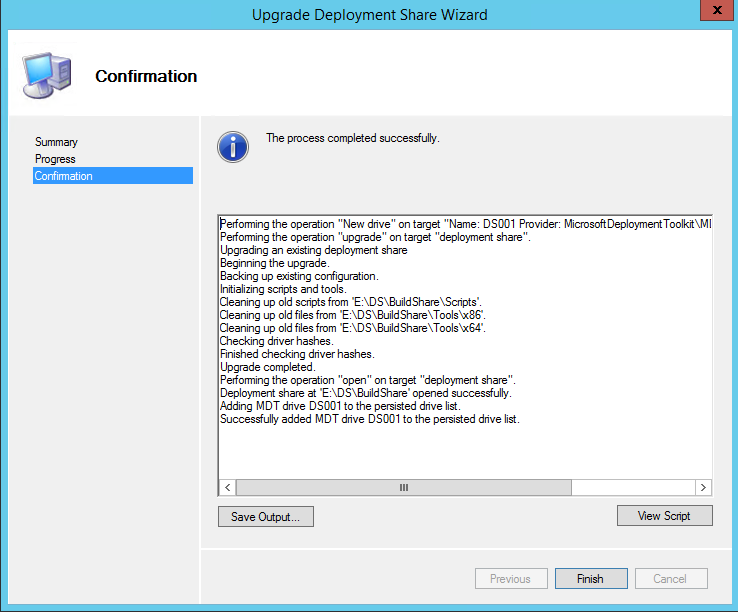
A new window will showed up to put a resume of DS.

025-007

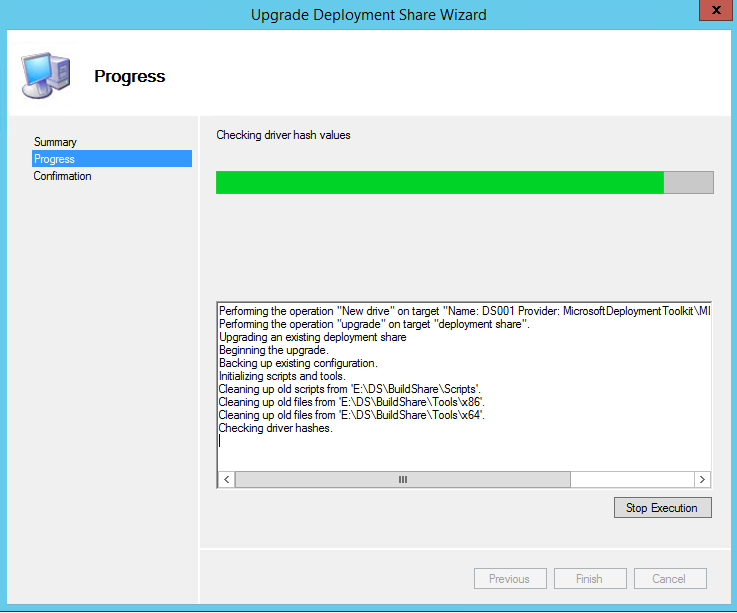
The process runs a PowerShell command which clear some unused files (Scripts and tools) which are really no longer available (and needed) for this new version. Secondly, will proceed a validation for every driver hashes on the DS. The time of this operation will depends on the amount of data on the DS. In my case just took a few minutes.

025-008

025-009

Enjoy MDT 2013 Update 2!


/ Fabio


Introducing Azure RMS – What it is? What it does?

Recently, I was requested to get involved to a project design and implementation of Azure Rights Management Services (RMS) solution. Unfortunately and to be honest, I found a poor quantity and quality of information around internet and I’ve read a lot of information and retain a few of that.

As you probably know, the Azure RMS is a component of the Microsoft Enterprise Mobility Suite (EMS) and the less known as well. Probably some of you know the concept as IRM (Information Rights Management) because is available through an Office 365 subscription. I could guess that several companies which have Office 365 subscriptions and aren’t taking any advantage at all of this feature.

Resuming, I feel like this is the EMS component that have less traction because the customers don’t even know how it works and how they can gain several security and productive improvements with Azure RMS.

In a very high-level view, Azure RMS is a feature with file encryption capabilities to tag specific files with configured options (or templates). These templates can (and should) be created into the cloud through the Azure Portal, and be used “On-premises” also.

Despite of that, consists in an significant evolution of a developed concept “On-Premises” named Rights Management Services. The truth is that the traditional RMS had a huge limitation: as the name says, only worked inside of the organization. So, nothing more than a huge cloud implemented solution around the globe like Office 365 to expand it and deploy it. So why is that not having the deserved impact and implementation?

Backing to the technology, Azure RMS have three distinct goals:

  • Encrypt files to be distributed through Outlook;
  • Encrypt files In-place;
  • Encrypt shared files in a File Server infrastructure (through FCI role);

Below, I share a high-level view around each one.

Encrypt files to be distributed through Outlook: The first one is a great improvement if you want to share file(s) with someone into your organization (will be available for outside soon) and you want to be sure and safe that the file(s) won’t be accessed by anyone else. Resuming, you can put a tag on the file(s), get tracking on it, and be safe that the file(s) will be only accessed by the right person(s) even if you’ve distributed for an extended contact list.

Encrypt files In-place: Directly designed to be used in-place, on the files placed on the local hard drive. The concept is to protect some sensitive information that even if the file will be accessed by other user on the network, the file can’t be opened by anyone else.

Encrypt shared files in a File Server infrastructure (through FCI role): Is a feature that is installed and configured on the File Server on the organization that have capabilities to scan a specific folder or location and encrypt it to be accessed only by the authorized groups. This is a huge improvement to a traditional NTFS permissions. Have some requirements like a dedicated server on-premises to get the templates but is very simple to implement (not so simple to configure it) and compensates for sure the implementation effort.

One amazing that i think that deserve an highlight is the fact that for those of this options, the owner of the documents can access to a Azure RMS portal and have tracking information about “his” files like who could accessed successfully and wh0 don’t; how many times was the file read/wrote; in which countries this accesses occurred, and so on.

I’m really excited about this technology and in a near future, I’ll be focused and hope to post a lab creation and a few demos around (at least) main capabilities of this (and less known) technology.

Taking the opportunity to wish a nice Christmas to all of the deploymentlab.net visitors!

Enjoy Christmas, Enjoy Cloud and enjoy Azure RMS!

/ Fabio

Introducing Azure AD Join and Domain Services

As we know, Windows 10 became available in August with a lot of benefits to our customers, and with “him”, several cloud changes were been questioned. In the near future, Microsoft Azure will assume a crucial role at most of global organizations, and even the most skeptical IT decision makers will be surrounded to their benefits and felt excited with that.

Azure AD consists on a directory behind Office 365 and Intune subscriptions. So, if we want to manage Windows 10 devices (Laptops, Surfaces..) through Azure AD, we’ve two options:

  • Azure AD Join
  • Workplace Join

These two options have distinct goals. Let take a quick dive on it.

Let me start with the Workplace Join. Resuming, consists on a feature built natively for Windows 8.1, which allow users to access to specific identified corporate services and resources. Was been improved for Windows 10, and allow the employee who uses their personal phone (or computer, or tablet,…) to extend its (or their) functionalities. Basically, consists in a high-level trust mechanism established between organization and employee. The resource (phone, computer, tablet,…) will be represented on the Azure AD and provides to IT an assessment view and reporting, but as expected, provide only few actions and control about them. Is directly built and designed for BYOD scenarios.

In the other hand, if your IT dept. are distributing provisioned Windows 10 devices to employees which will have mainly accesses to Office 365, web apps (deployed through “My Apps” portal) and other “cloud-based” resources, the Azure AD Join should be your choice. Provide several gains to the prior one including the Windows 10 login with Azure AD accounts/credentials and the Single-Sign-On for cloud-based (and On-Premises) services and resources. In addition, provide a crucial improvement – providing the native Microsoft Intune enrollment during its join.

It’s impossible not talk (or write in this case) about the Domain Services of Azure AD, which is currently in Preview and released recently by Microsoft. Domain Services is still a «baby» and according to that fact, will grow significantly for sure in the next weeks, which in fact can have some risks if you’re considering this implementation in a short period. Despite of that, Domain Services provide the possibility to consuming local Group Policy Objects (GPOs) and deploy them via Azure AD, or to create new ones (and deploy them of course). The main goal will be achieved: manage all supported devices through the cloud just as your doing now On-Premises. Additionally, Domain Services will integrate natively with the current Azure tenants (could it be in a different way?).

Let me share some deep sources about it Azure AD Join and Azure AD Domain Services.

Enjoy Azure AD!

/ Fabio